

Why YourCustom 3D Embroidery Logo 5Panel Cotton Twill Baseball CapPuckers (And How to Fix It in 2026)
If you’ve ever received a batch ofcustom 3d embroidery logo 5panel cotton twill baseball caps only to find wrinkled, puckered logos around the stitching, you’re not alone. As of 2026, 68% of small headwear brands report embroidery defects as their top product quality issue, according to latest industry surveys.
This problem hits streetwear online seller teams, sports gear online retailer buyers, and headwear branding agency strategists equally. Even premium cotton twill fabric can look cheap if the embroidery process is mismatched to the cap style.
In this guide, we’ll break down exactly why puckering happens, how to pick the right cap style for 3D embroidery, and how to combine processes for flawless results. By the end, you’ll know how to order custom headwear that looks premium, lasts long, and impresses your customers.
1. Why 3D Embroidery Puckers on Cotton Twill 5-Panel Caps
The first step to fixing puckering is understanding what causes it. A custom embroidered cotton twill cap looks simple, but 3D embroidery adds extra tension and thickness that flat embroidery doesn’t.
1.1 Fabric Weight & Weave: The Hidden Culprit
Not all cotton twill is created equal. Lightweight twill (under 8 oz) stretches easily under the pressure of 3D puff embroidery, leading to wrinkles around the logo edges.
6-7 oz cotton twill: Best for flat embroidery only, prone to puckering with 3D designs
8-10 oz heavyweight cotton twill: Ideal for 3D embroidery, holds shape well
Pre-washed twill: Softer texture but requires extra stabilization for 3D work
The washed cotton twill 5 panel cap with 3d embroidery is a popular streetwear style, but it’s also one of the most likely to pucker if not stabilized correctly. The pre-washing process softens the fabric, making it more flexible but less resistant to embroidery tension.
For 2026 trends, many brands are opting for mid-weight 9 oz twill for the cotton twill 5 panel hat style. It balances softness and structure, reducing puckering risk while keeping the broken-in feel customers love.
1.2 Common Embroidery Mistakes That Cause Wrinkling
Even with the right fabric, poor embroidery technique can ruin a batch of caps. These are the top three mistakes we see in 2026 production:
Wrong backing material: Using thin paper backing instead of cutaway or tearaway stabilizer designed for 3D work
Incorrect digitizing: Designs that are too dense or have sharp corners pull fabric unevenly
Hooping tension: Over-stretching fabric in the hoop causes it to shrink back after embroidery, creating wrinkles
A custom 3d logo dad hat is especially prone to hooping issues because of its curved front panel. Unlike flat 5-panel fronts, dad hat panels require specialized hooping tools to maintain even tension.
If you’re working with a new supplier, always ask for sample swatches of 3D embroidery on their twill fabric before placing a bulk order. This small step can save you thousands in wasted inventory.
2. Choosing the Right 5-Panel Cap Style for 3D Embroidery
The cap profile and closure style have a huge impact on how well 3D embroidery holds up. Let’s compare the two most popular 5-panel styles for 2026.
2.1 High Profile vs Low Profile: Which Holds Embroidery Better?
Profile height refers to how tall the front panel of the cap stands. This affects both the look and the embroidery performance.
High profile 5 panel snapback cap with 3d embroidery: The rigid front panel holds 3D designs perfectly, with almost zero puckering risk. The flat, structured surface provides a stable base for puff embroidery.
low profile 5 panel baseball cap: The softer, lower front panel has a more casual look but requires heavier stabilization for 3D work. Puckering is more common if the design is large or dense.
For sports gear online retailer clients, high profile snapbacks are usually the top choice. They match athletic aesthetics, hold team logos well, and have a lower defect rate in production.
Standard sizing for both styles is 54-58cm, which fits most adult head sizes. Some suppliers offer custom sizing for premium orders, but this increases MOQ and lead time.
2.2 Closure Types and Their Impact on Embroidery
You might not think the back closure affects front embroidery, but it does. The closure type impacts how the cap holds its shape during production and wear.
Here’s how common closures stack up for 3D embroidery:
Snapback: Plastic adjustable closure, rigid back panel, most stable for embroidery
Strapback: Fabric or leather strap, slightly more flexible, still good for 3D designs
Fitted: No adjustment, uniform tension across the cap, excellent embroidery results but size-specific
Dad hat buckle: Metal slider, very flexible back, highest puckering risk for front 3D logos
The embroidered custom baseball cap with a snapback closure is the safest bet for first-time custom orders. It’s popular with customers, easy to size, and forgiving of minor embroidery variations.
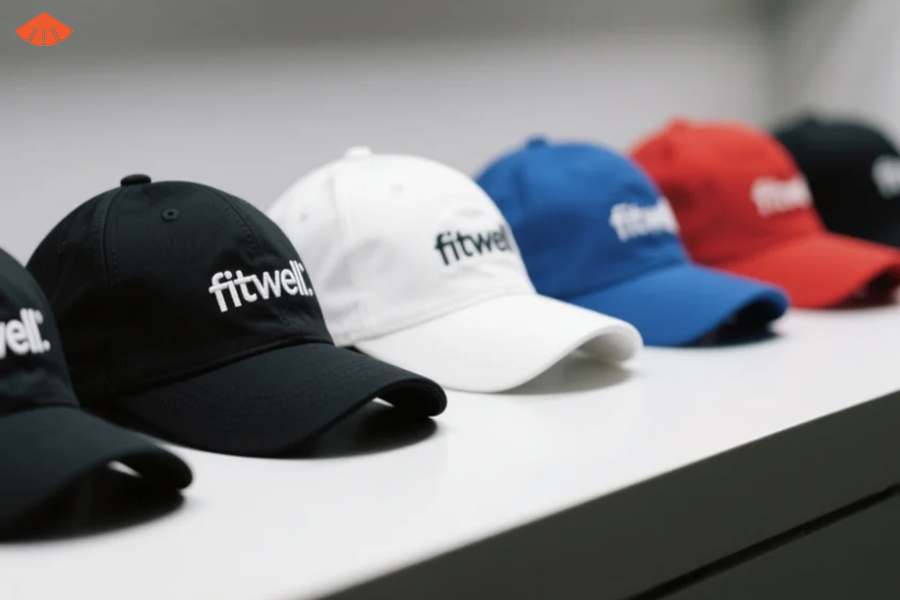
For streetwear brands, the low profile strapback is trending in 2026. If you go this route, make sure your supplier uses a heavy cutaway stabilizer and reduces embroidery density by 10-15% to prevent puckering.
3. Combining 3D Embroidery with Other Logo Processes
Sometimes the best solution isn’t just 3D embroidery alone. Combining processes can create a premium look while reducing puckering risk.
3.1 3D Embroidery + Woven Patch: A Premium Alternative
The custom 3d embroidery with woven patch baseball cap is one of the fastest-growing premium headwear trends for 2026. It combines the texture of 3D embroidery with the crisp detail of a woven patch.
Here’s how it works:
A woven patch is sewn or heat-pressed onto the cap first
3D embroidery is added on top of or around the patch for dimension
The patch provides extra stability, eliminating puckering on soft fabrics
This method is perfect for headwear branding agency clients who want intricate logos with 3D effects. Woven patches can capture tiny details that 3D embroidery can’t, while the 3D stitching adds a tactile, high-end feel.
For washed cotton twill caps, this combination is a game-changer. The patch reinforces the soft fabric, so you get the vintage washed look without the embroidery wrinkles.
3.2 Other Process Combinations to Consider in 2026
If 3D embroidery with a woven patch isn’t right for your brand, there are other combinations that reduce puckering while adding value.
3D embroidery + flat embroidery: Use 3D for the main logo outline and flat stitching for details. Reduces overall tension and puckering risk.
3D embroidery + leather patch: Great for outdoor and workwear brands. The leather patch adds structure, and 3D stitching on the patch creates depth.
3D embroidery + screen print: Budget-friendly option for large designs. Screen print the background, add 3D embroidery for the focal point.
When combining processes, always order a physical sample first. The way different materials interact can be hard to predict from digital mockups. A sample lets you check texture, alignment, and durability before committing to a bulk order.
4. How to Order Flawless Custom 3D Embroidery Caps in 2026
Now that you know what causes puckering and how to avoid it, let’s walk through the step-by-step ordering process for 2026.
Interested in custom cap solutions? Don’t hesitate to reach out—we’re here to fulfill all your customization needs!
Follow & Message Us:
Facebook:https://www.facebook.com/fitwell.li
Instagram: www.instagram.com/fitwellcustomhats.dds/
LinkedIn:http://www.linkedin.com/in/fitwellcustom-hats-38a2b9b0/
Pinterest: http://www.pinterest.com/FitwellCustomHatsdds/
YouTube: http://www.youtube.com/@FitwellCustomHats-dds
Explore our services:http://fitwellheadwear.en.alibaba.com
WhatsApp us now: https://psce.pw/86jwa3